These chests were a pain to sand and stain. An absolute pain. It took me over two years to complete them and at one point I almost tossed them in the garbage. The boxes were purchased from Hobby Lobby.
The problems: First the tops and sides of the boxes were so fragile they were difficult to sand. Second, I tried to use Minwax Gel Stain on the inside of the box – that went very poorly. On the plus side, this was a test of the Gel Stain before I put it on something much larger. I tossed the Gel Stain to never to be used again.
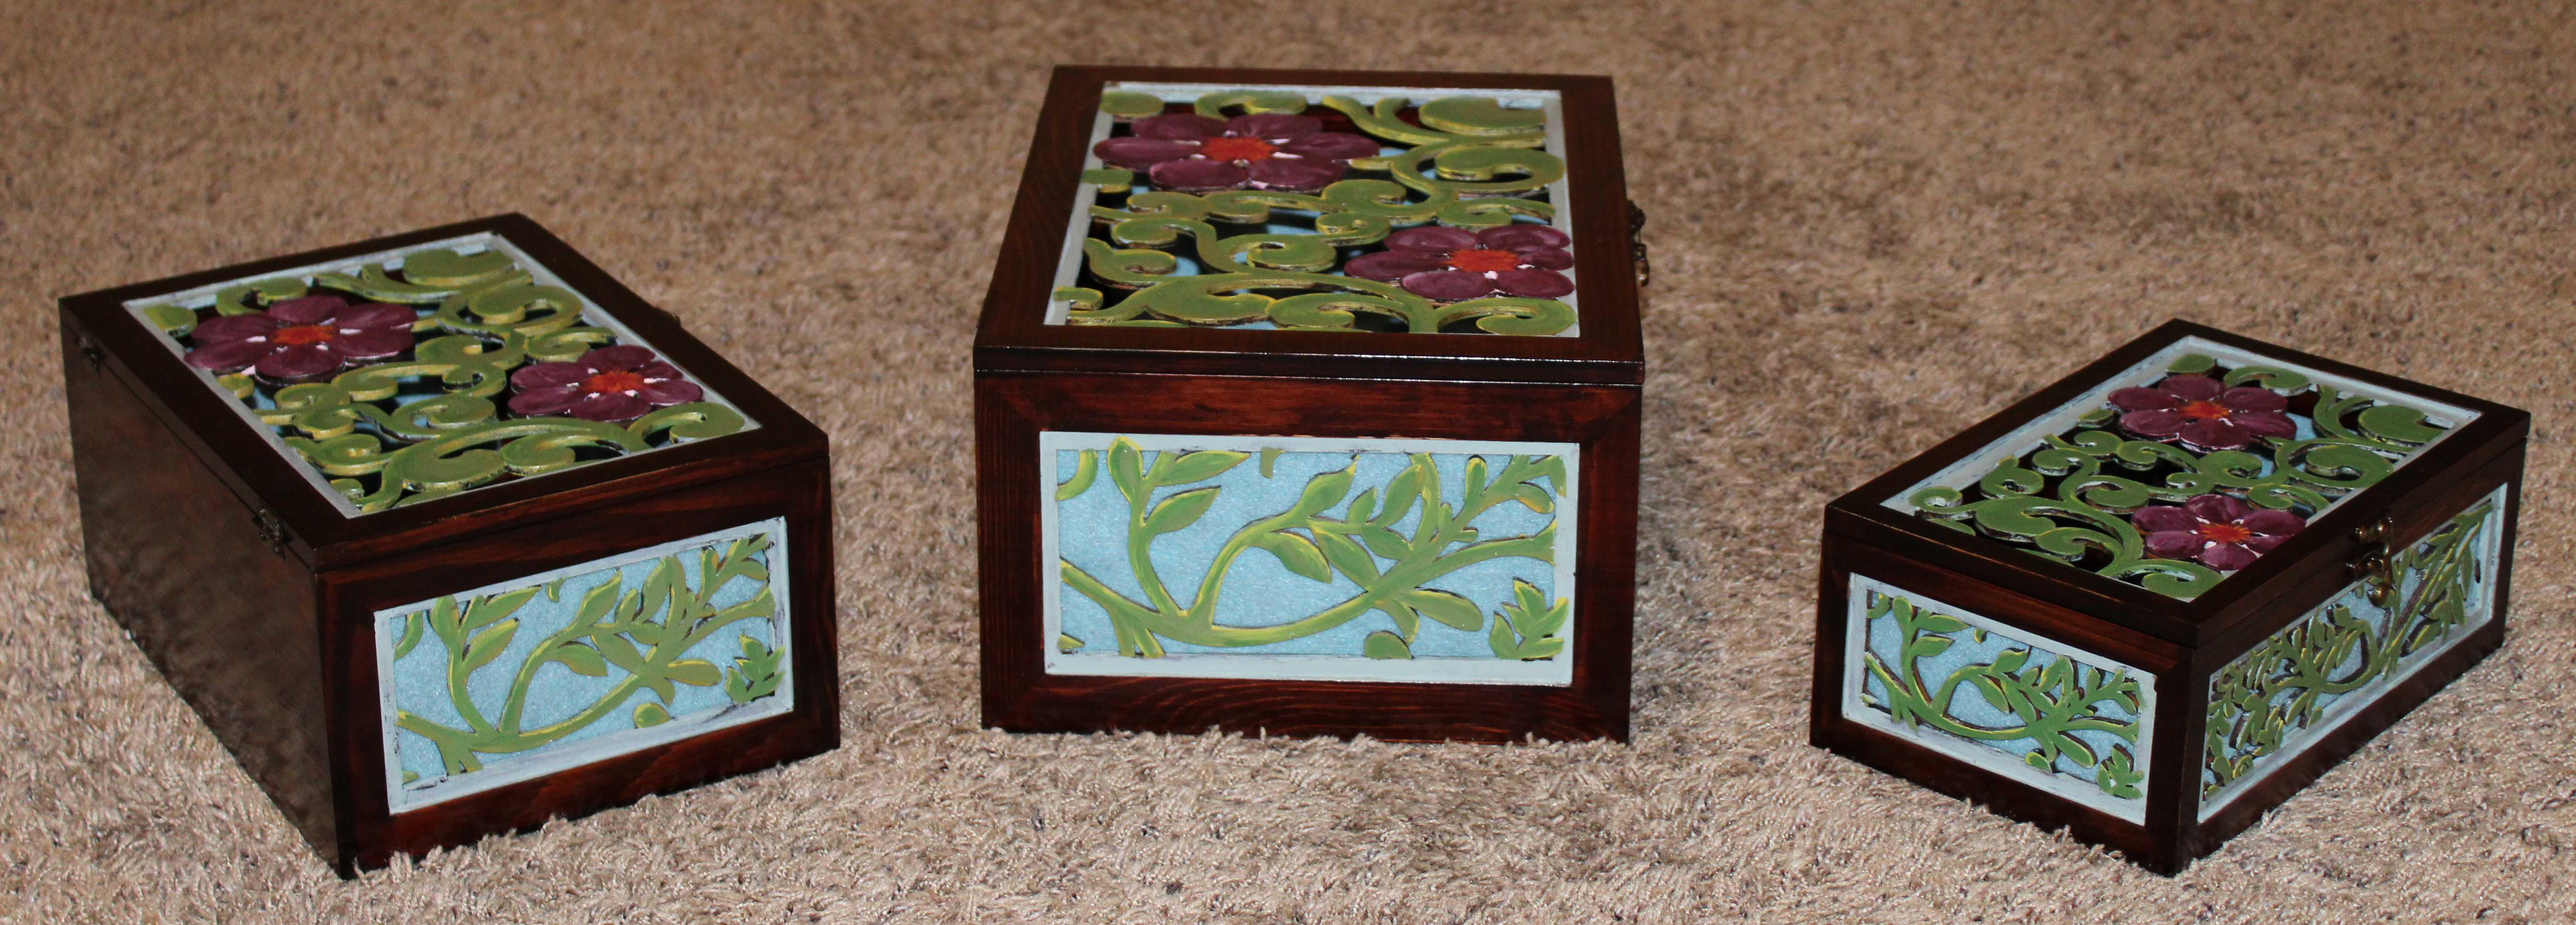
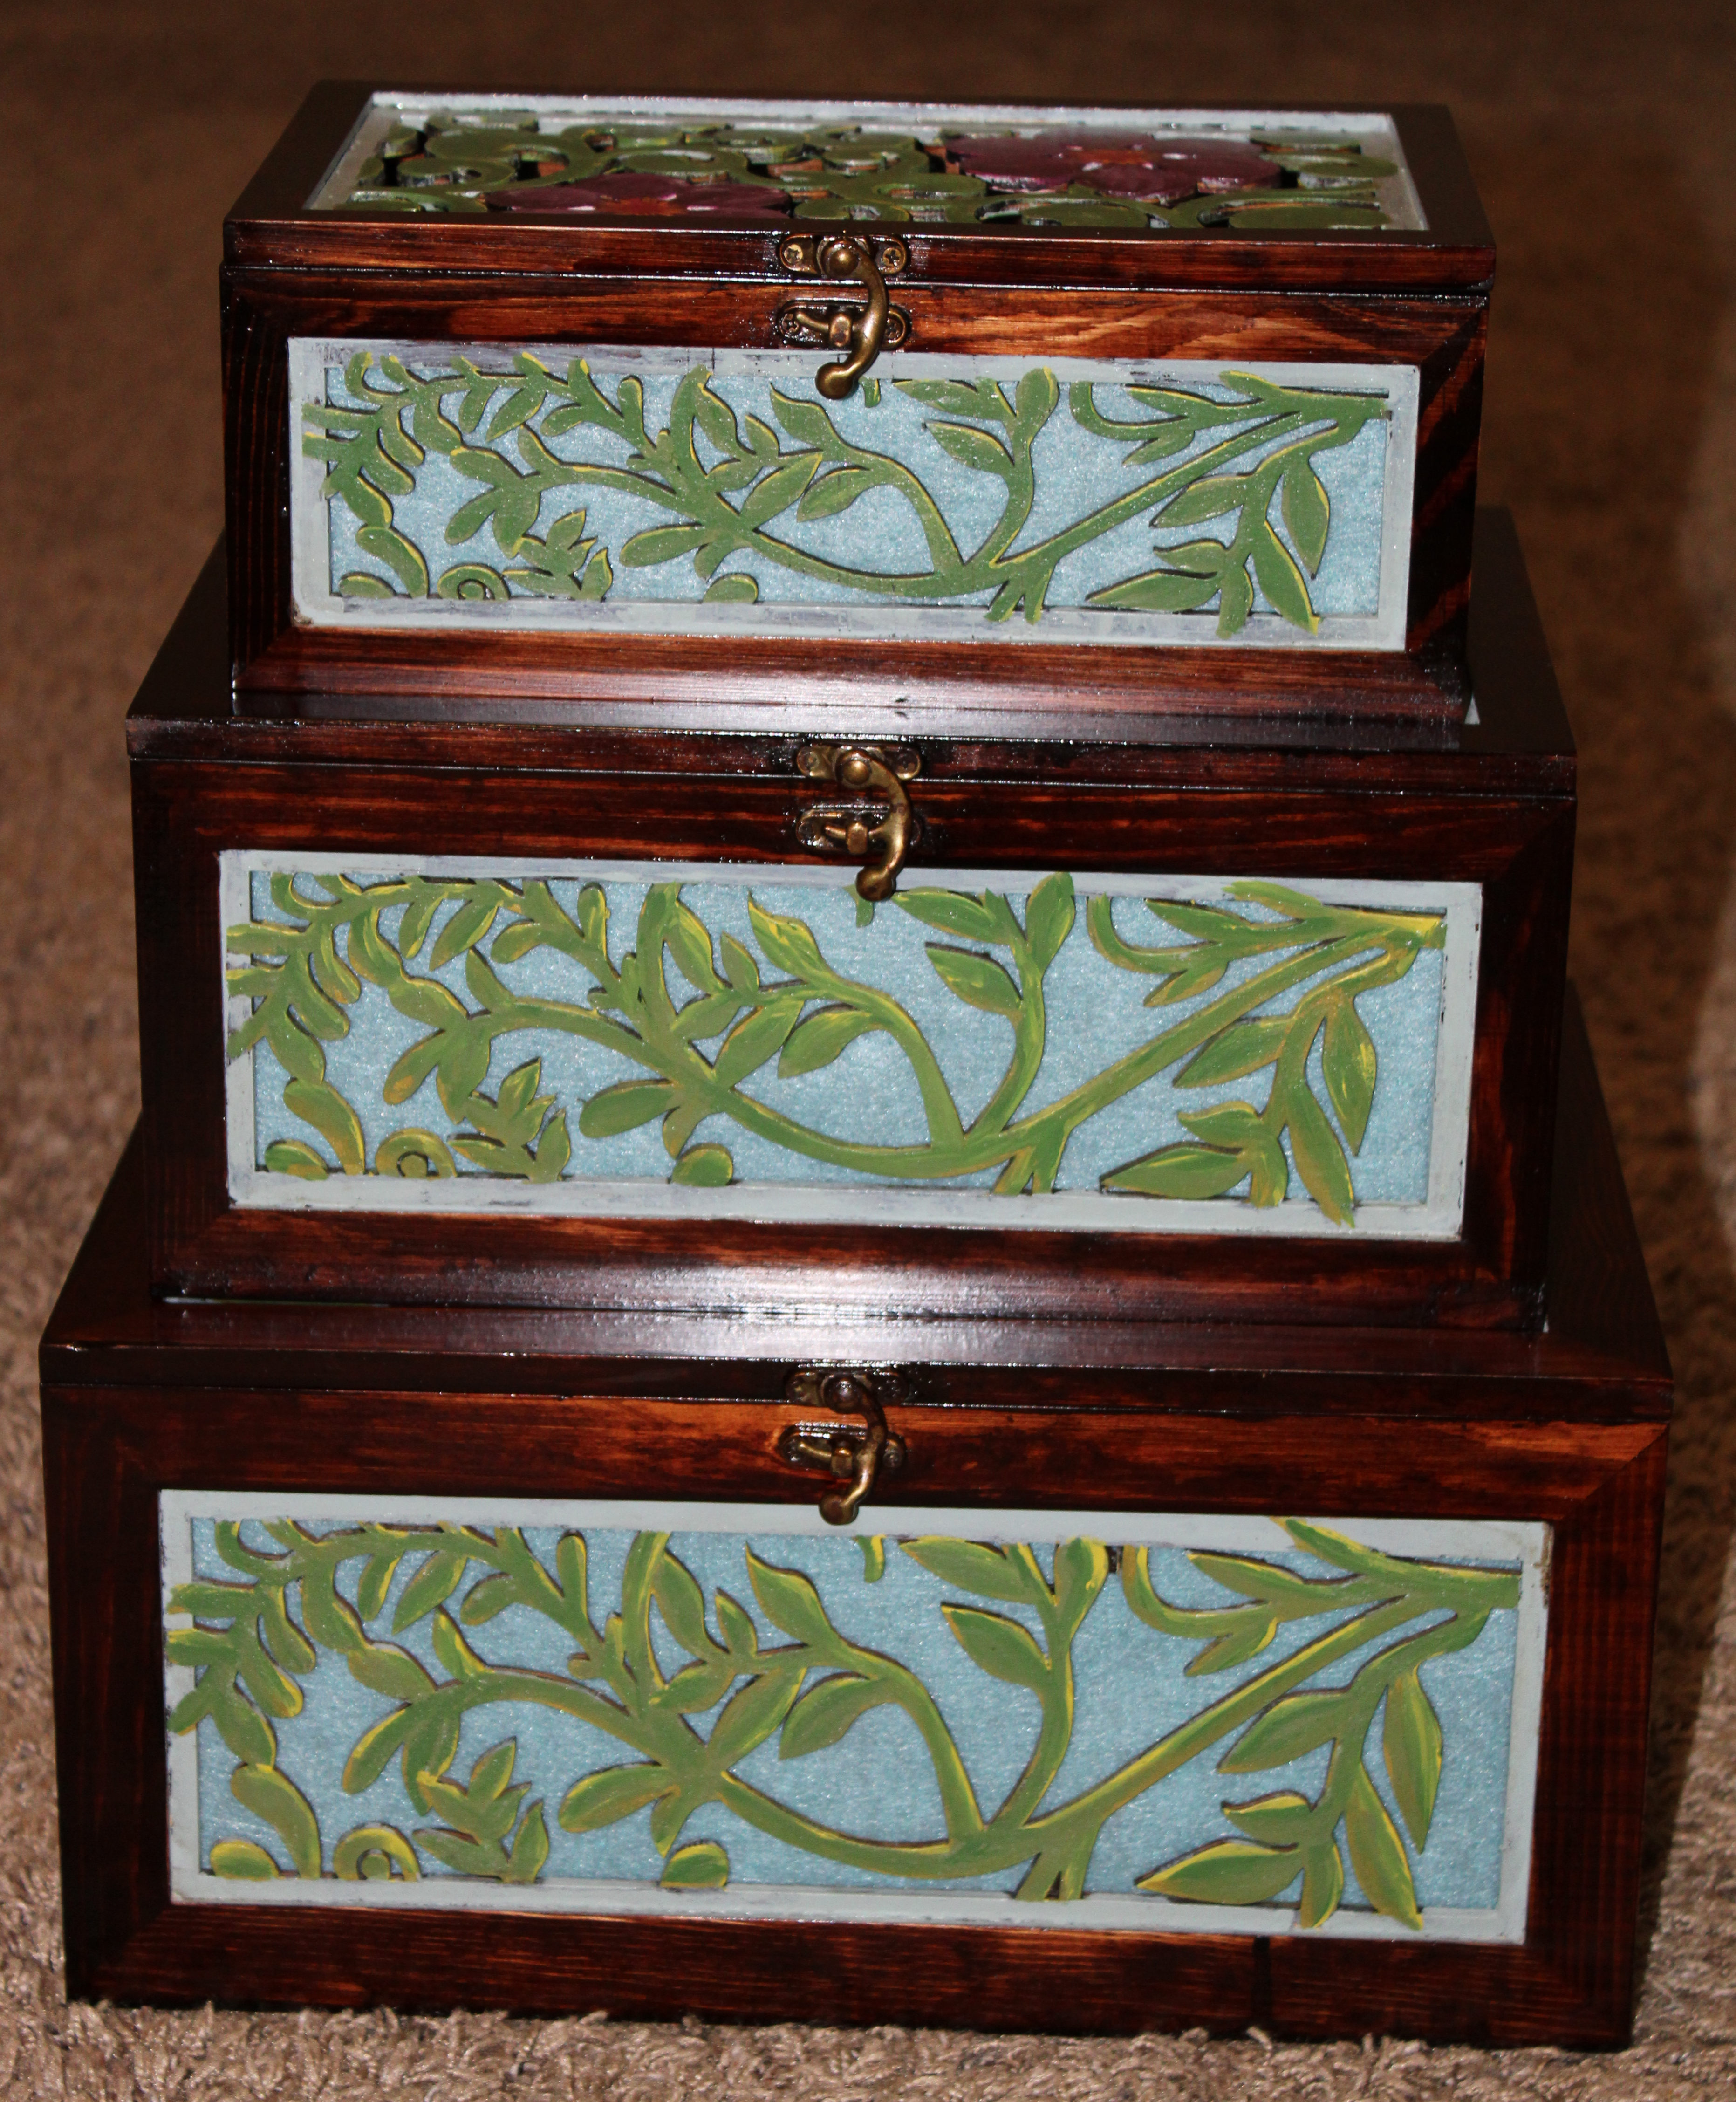
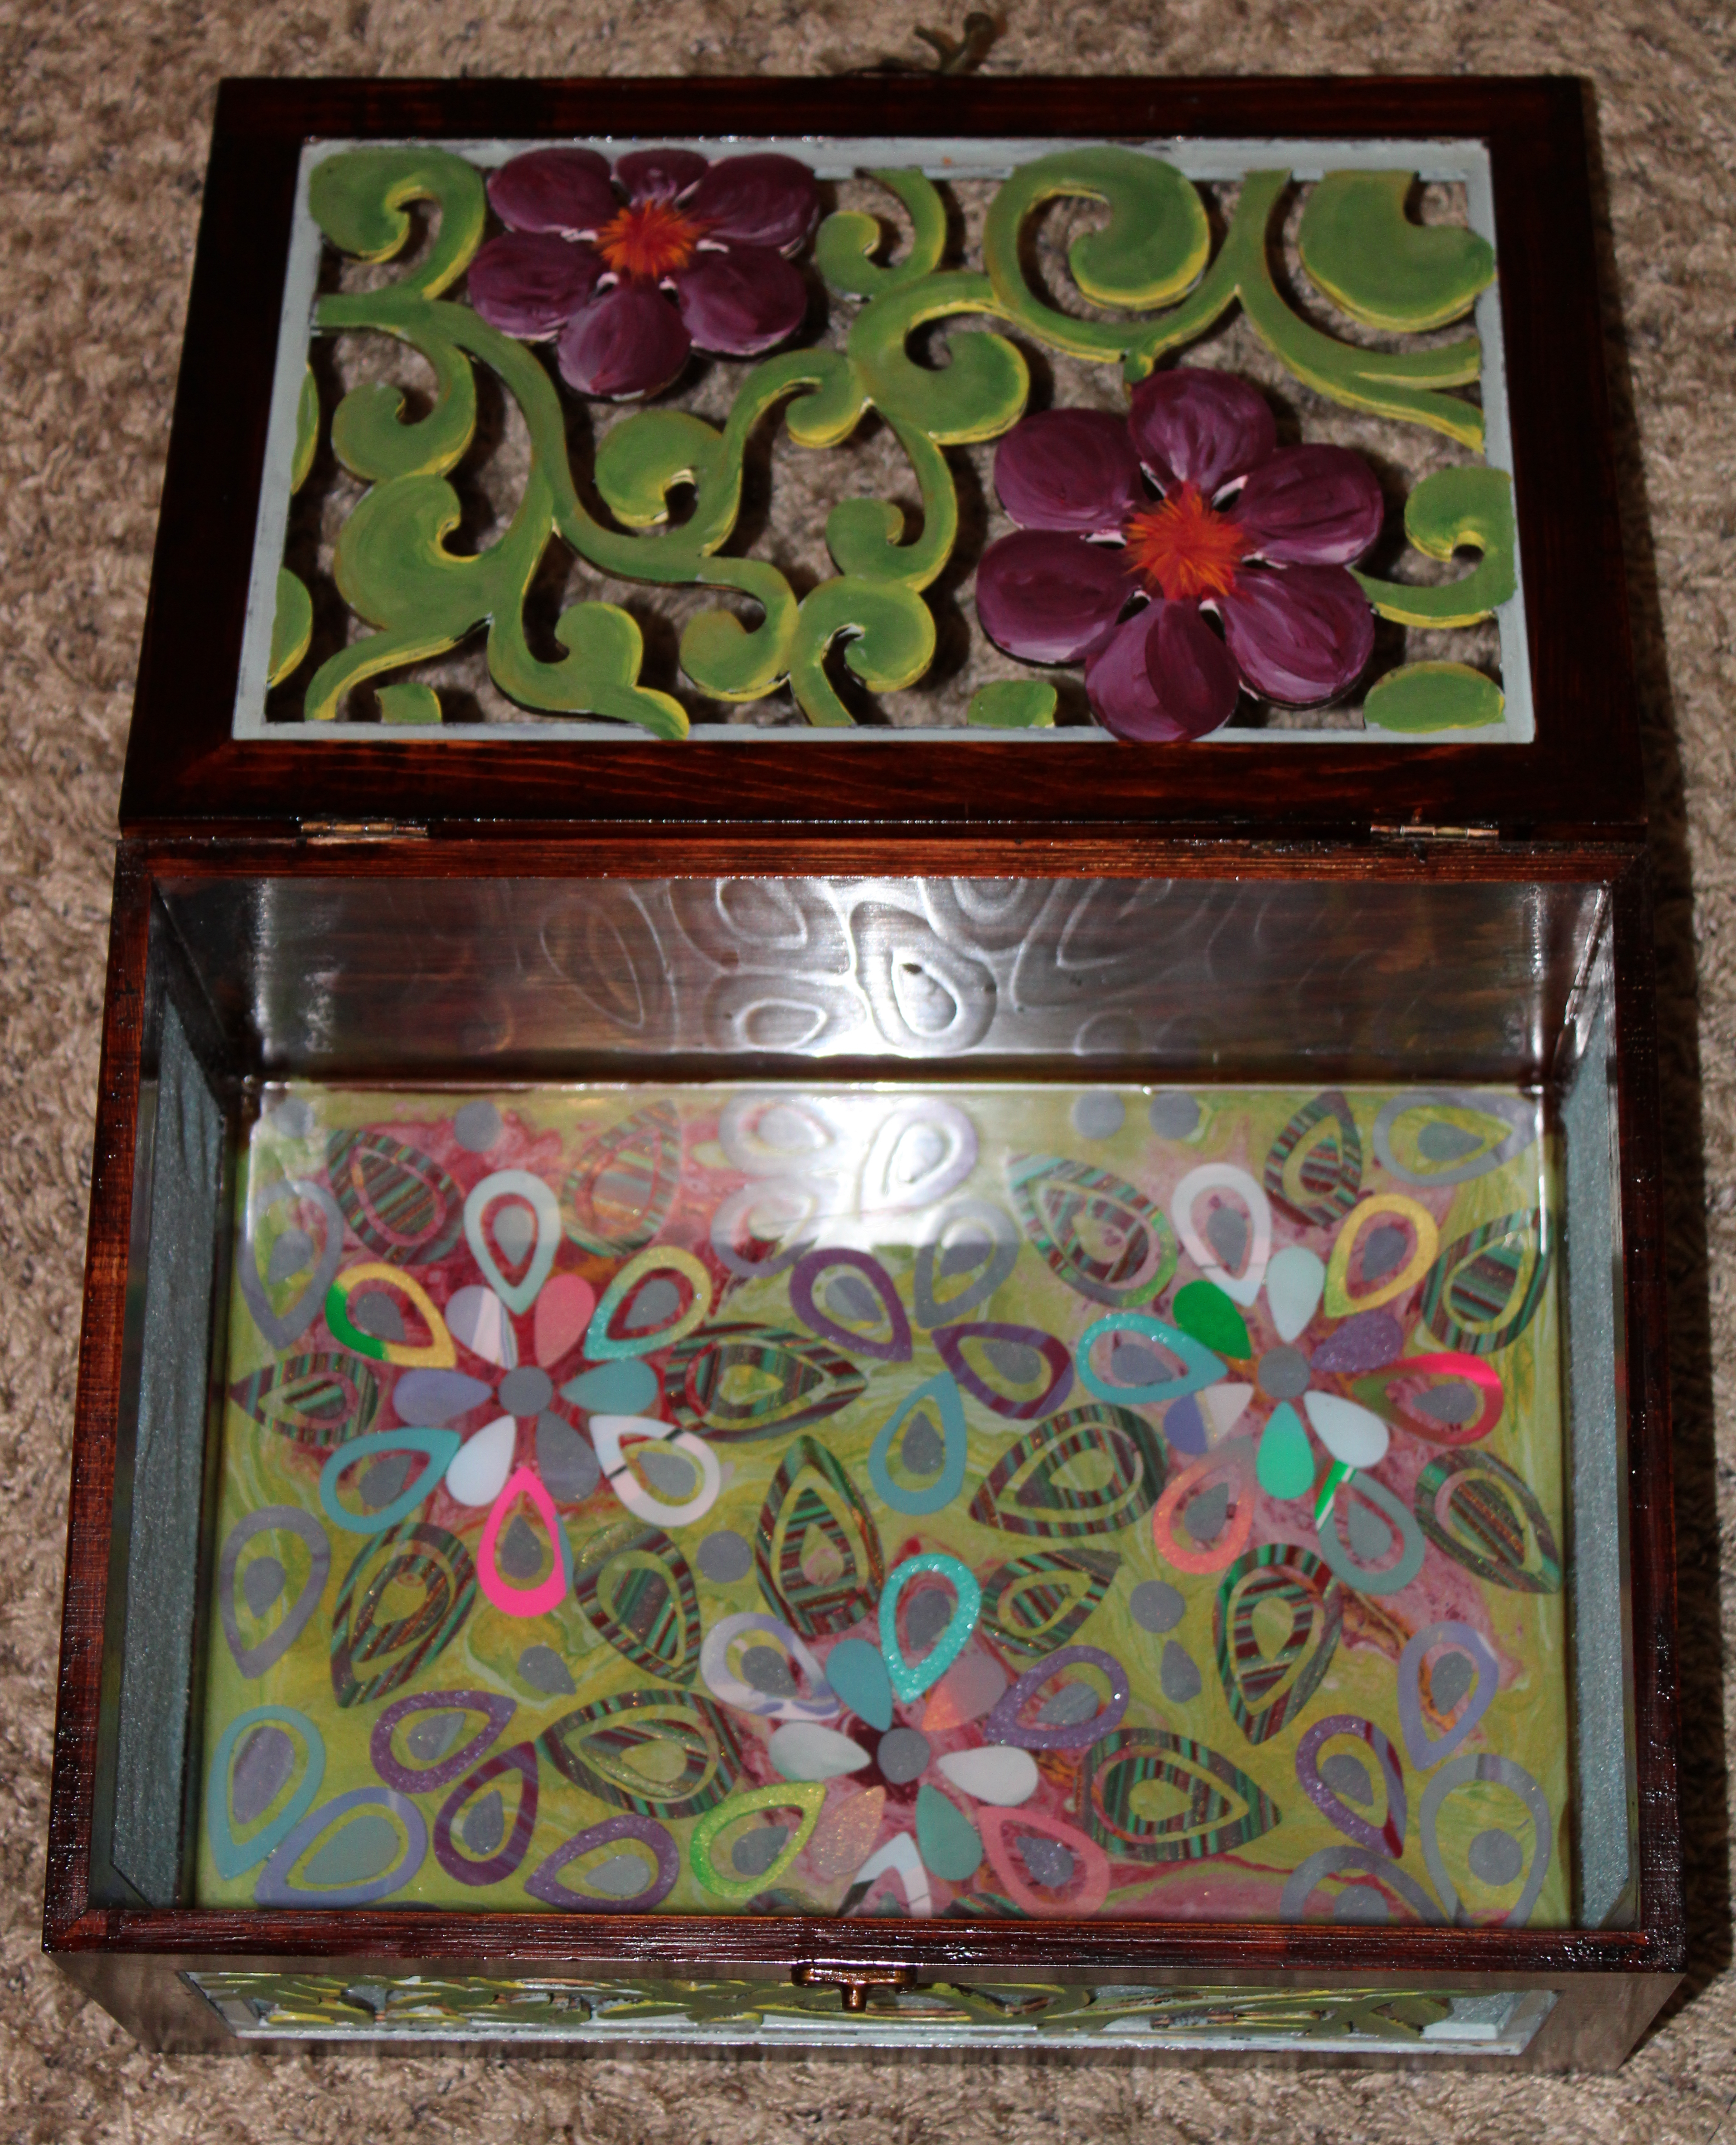
First, I sanded the boxes and applied stain all over, even the areas I intended to paint. Second, I applied the first coat of varnish to the areas I was not going to paint. I apply varnish to seal the wood just in case I accidently got paint on unwanted areas of the boxes. Paint can easily be cleaned off the varnish areas before it dries, otherwise the paint would soak into the wood. Next, I painted the tops, sides, and the inside bottoms of the boxes using chalk paint.
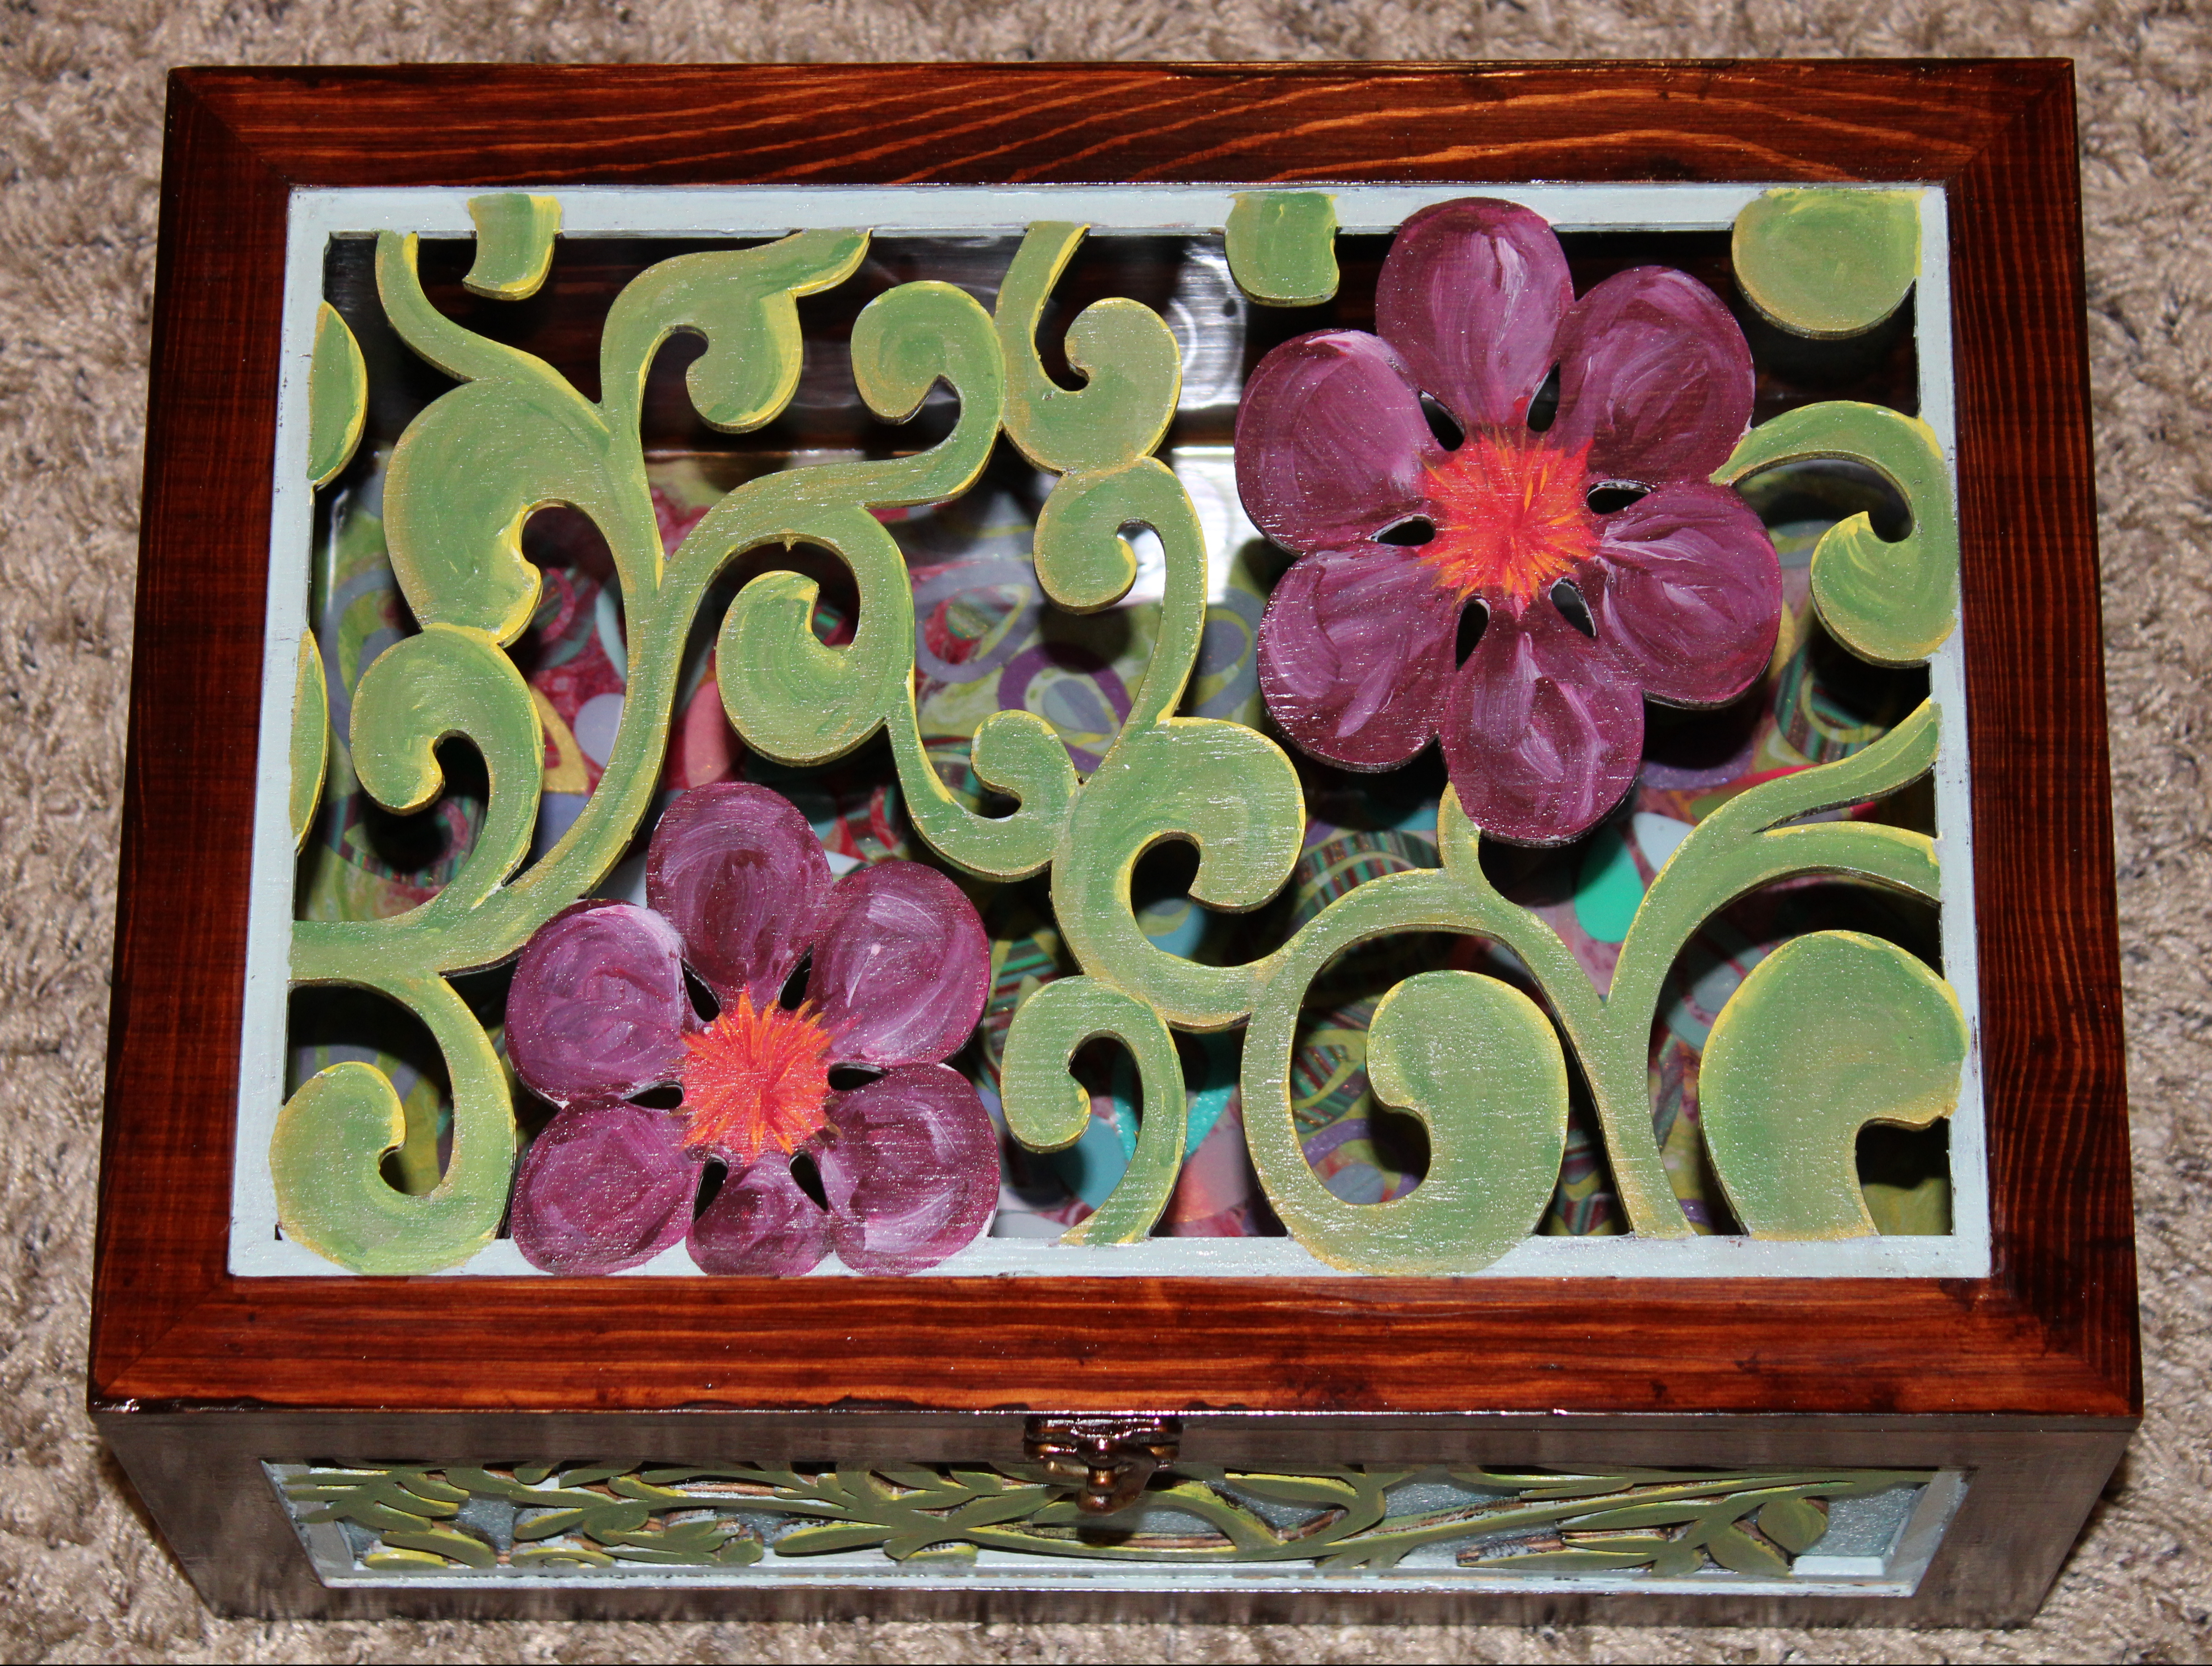
After everything had dried and I was satisfied with the painting, I sanded the box again and applied another coat of varnish. Matte varnish on the painted areas and gloss varnish on the stained areas. Afterwards, I decided to add something extra. I created a mosaic pattern on the inside of the box, which I created from Sculpey Clay. I put a light coat of varnish on the bottom of the box before I poured resin over the pattern.
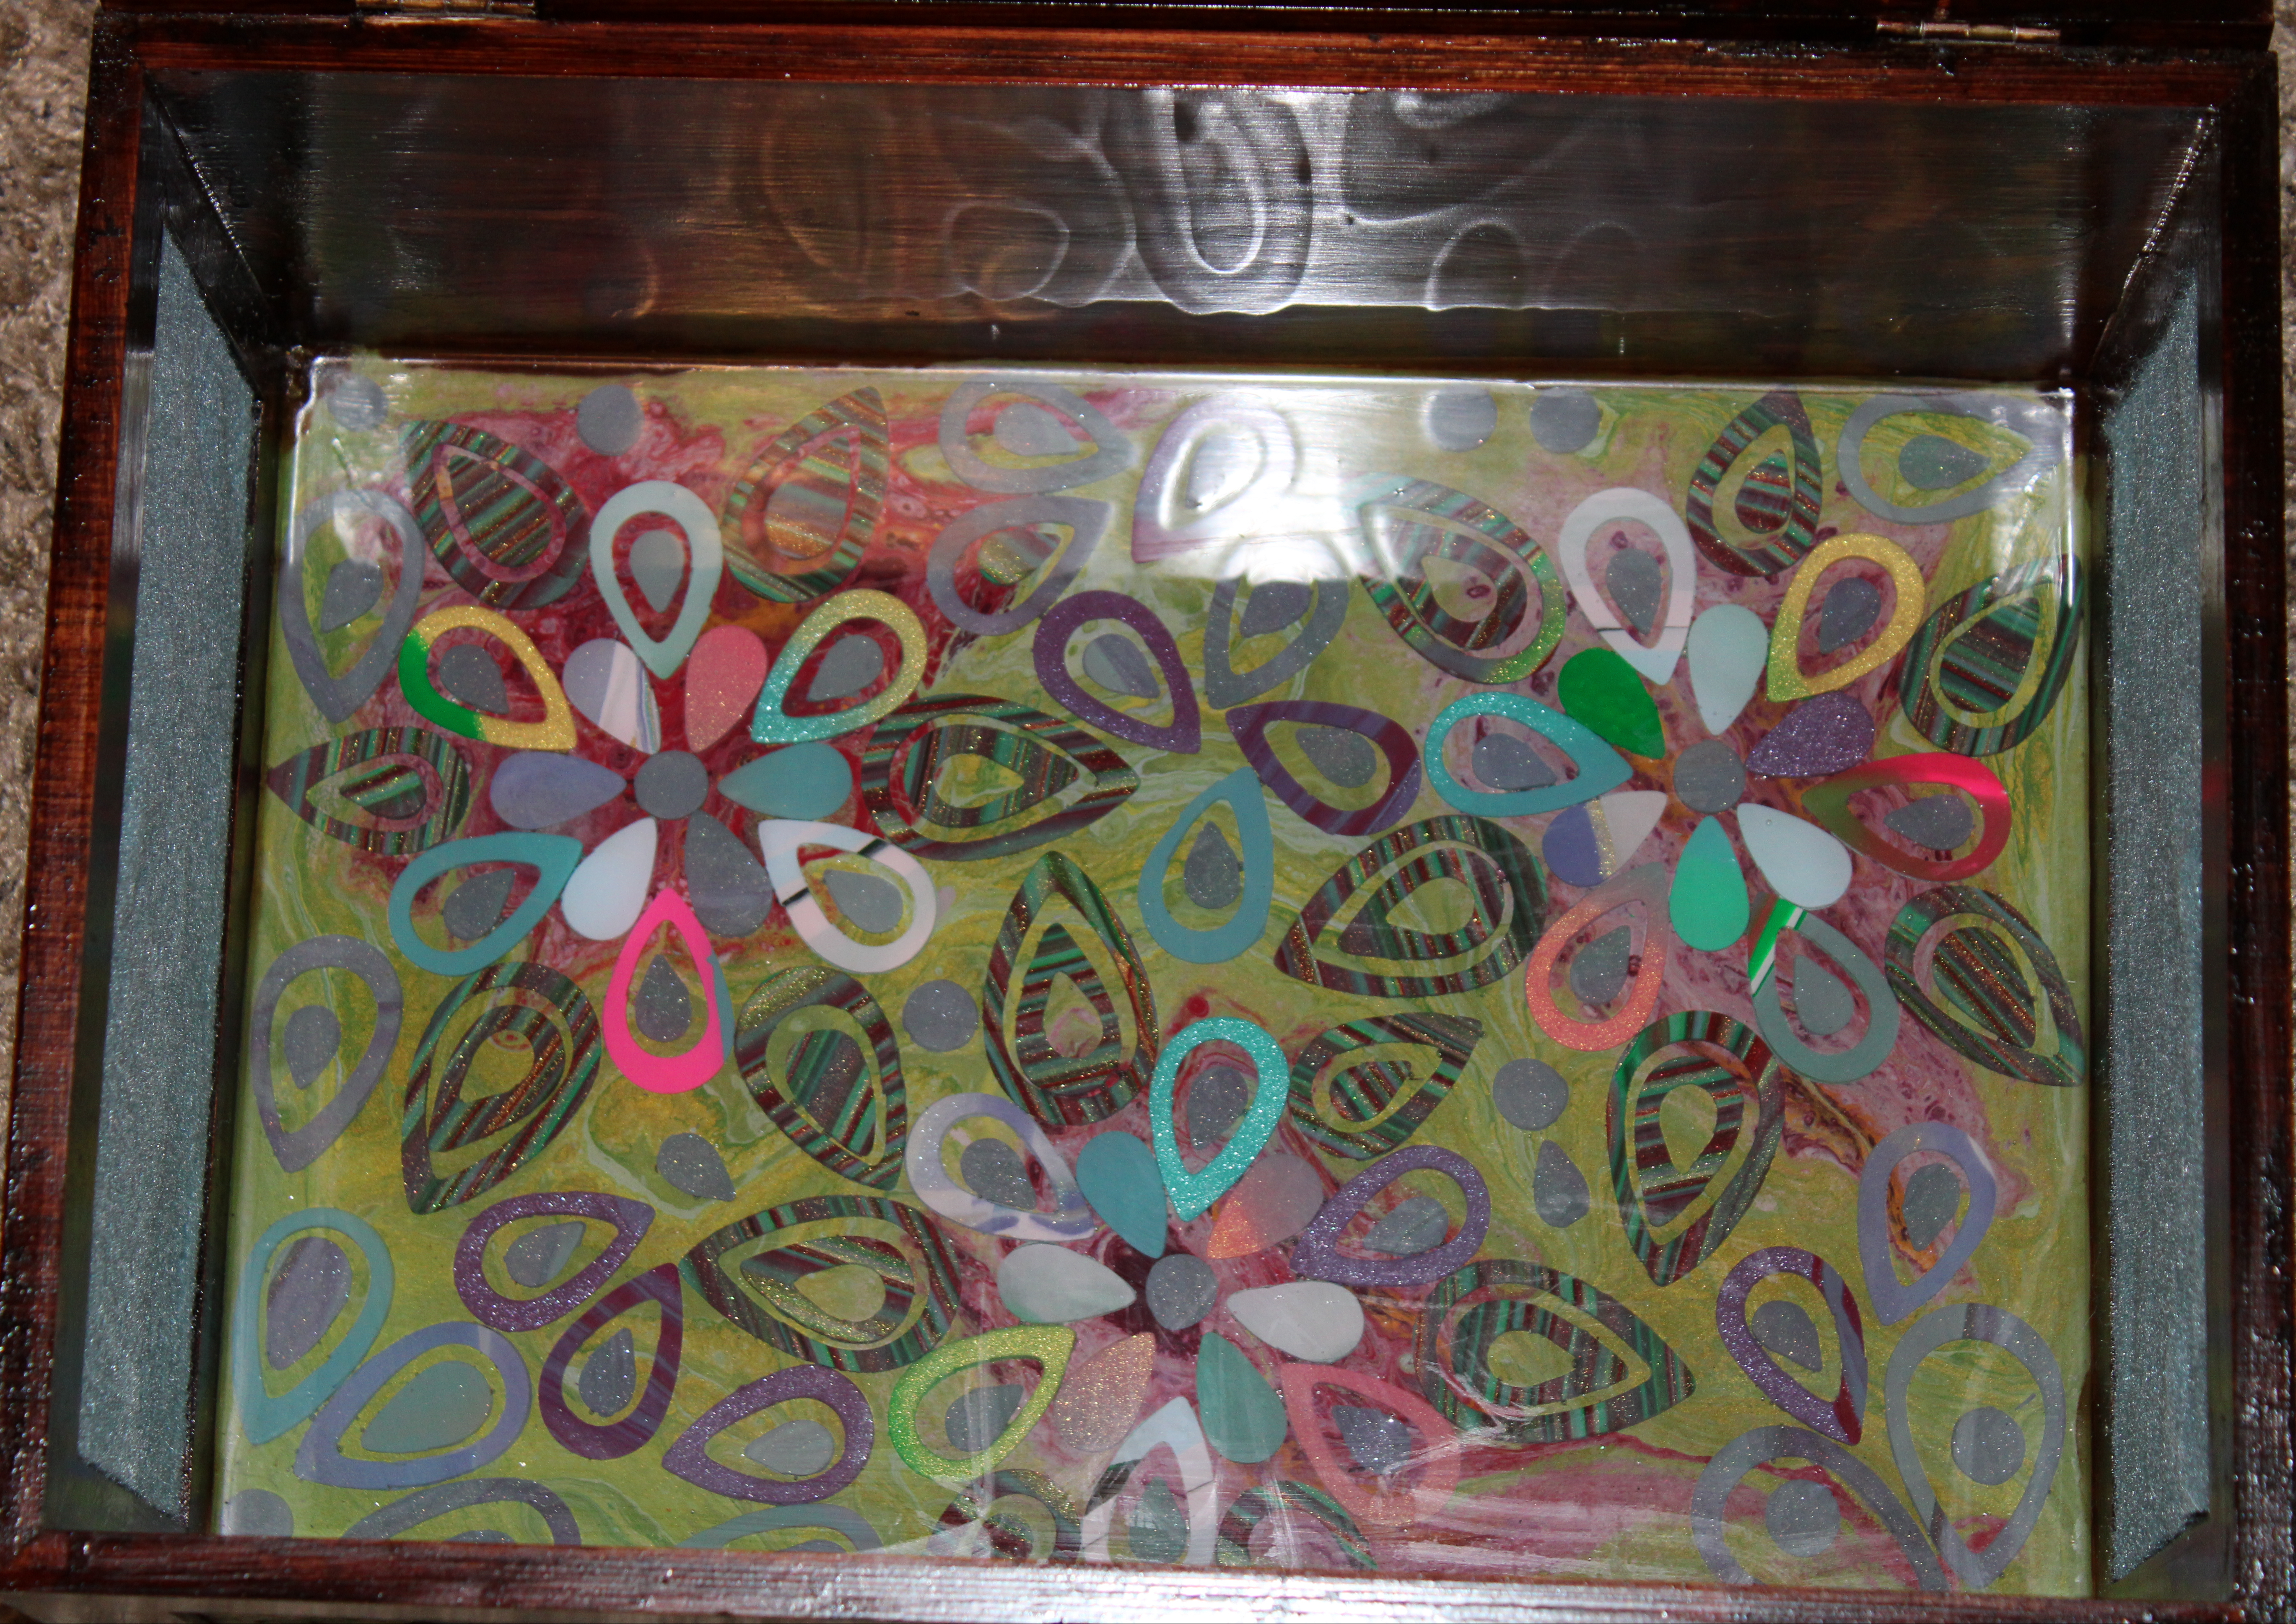
Since the bottom of the box was already painted. I didn’t see the need to fill the spaces with grout.
I still was not satisfied with color of the boxes. I wanted them to be darker. So, I lightly sanded the boxes with steel wool and applied a coat of Minwax Polyshade. It has stain and polyurethane.
Felt was added to the front and sides of the boxes because I thought if anyone wanted to store anything small in the boxes, it would just fallout through the holes.